App Tour
Learn where everything is in the AgentOne desktop app and what each part does.
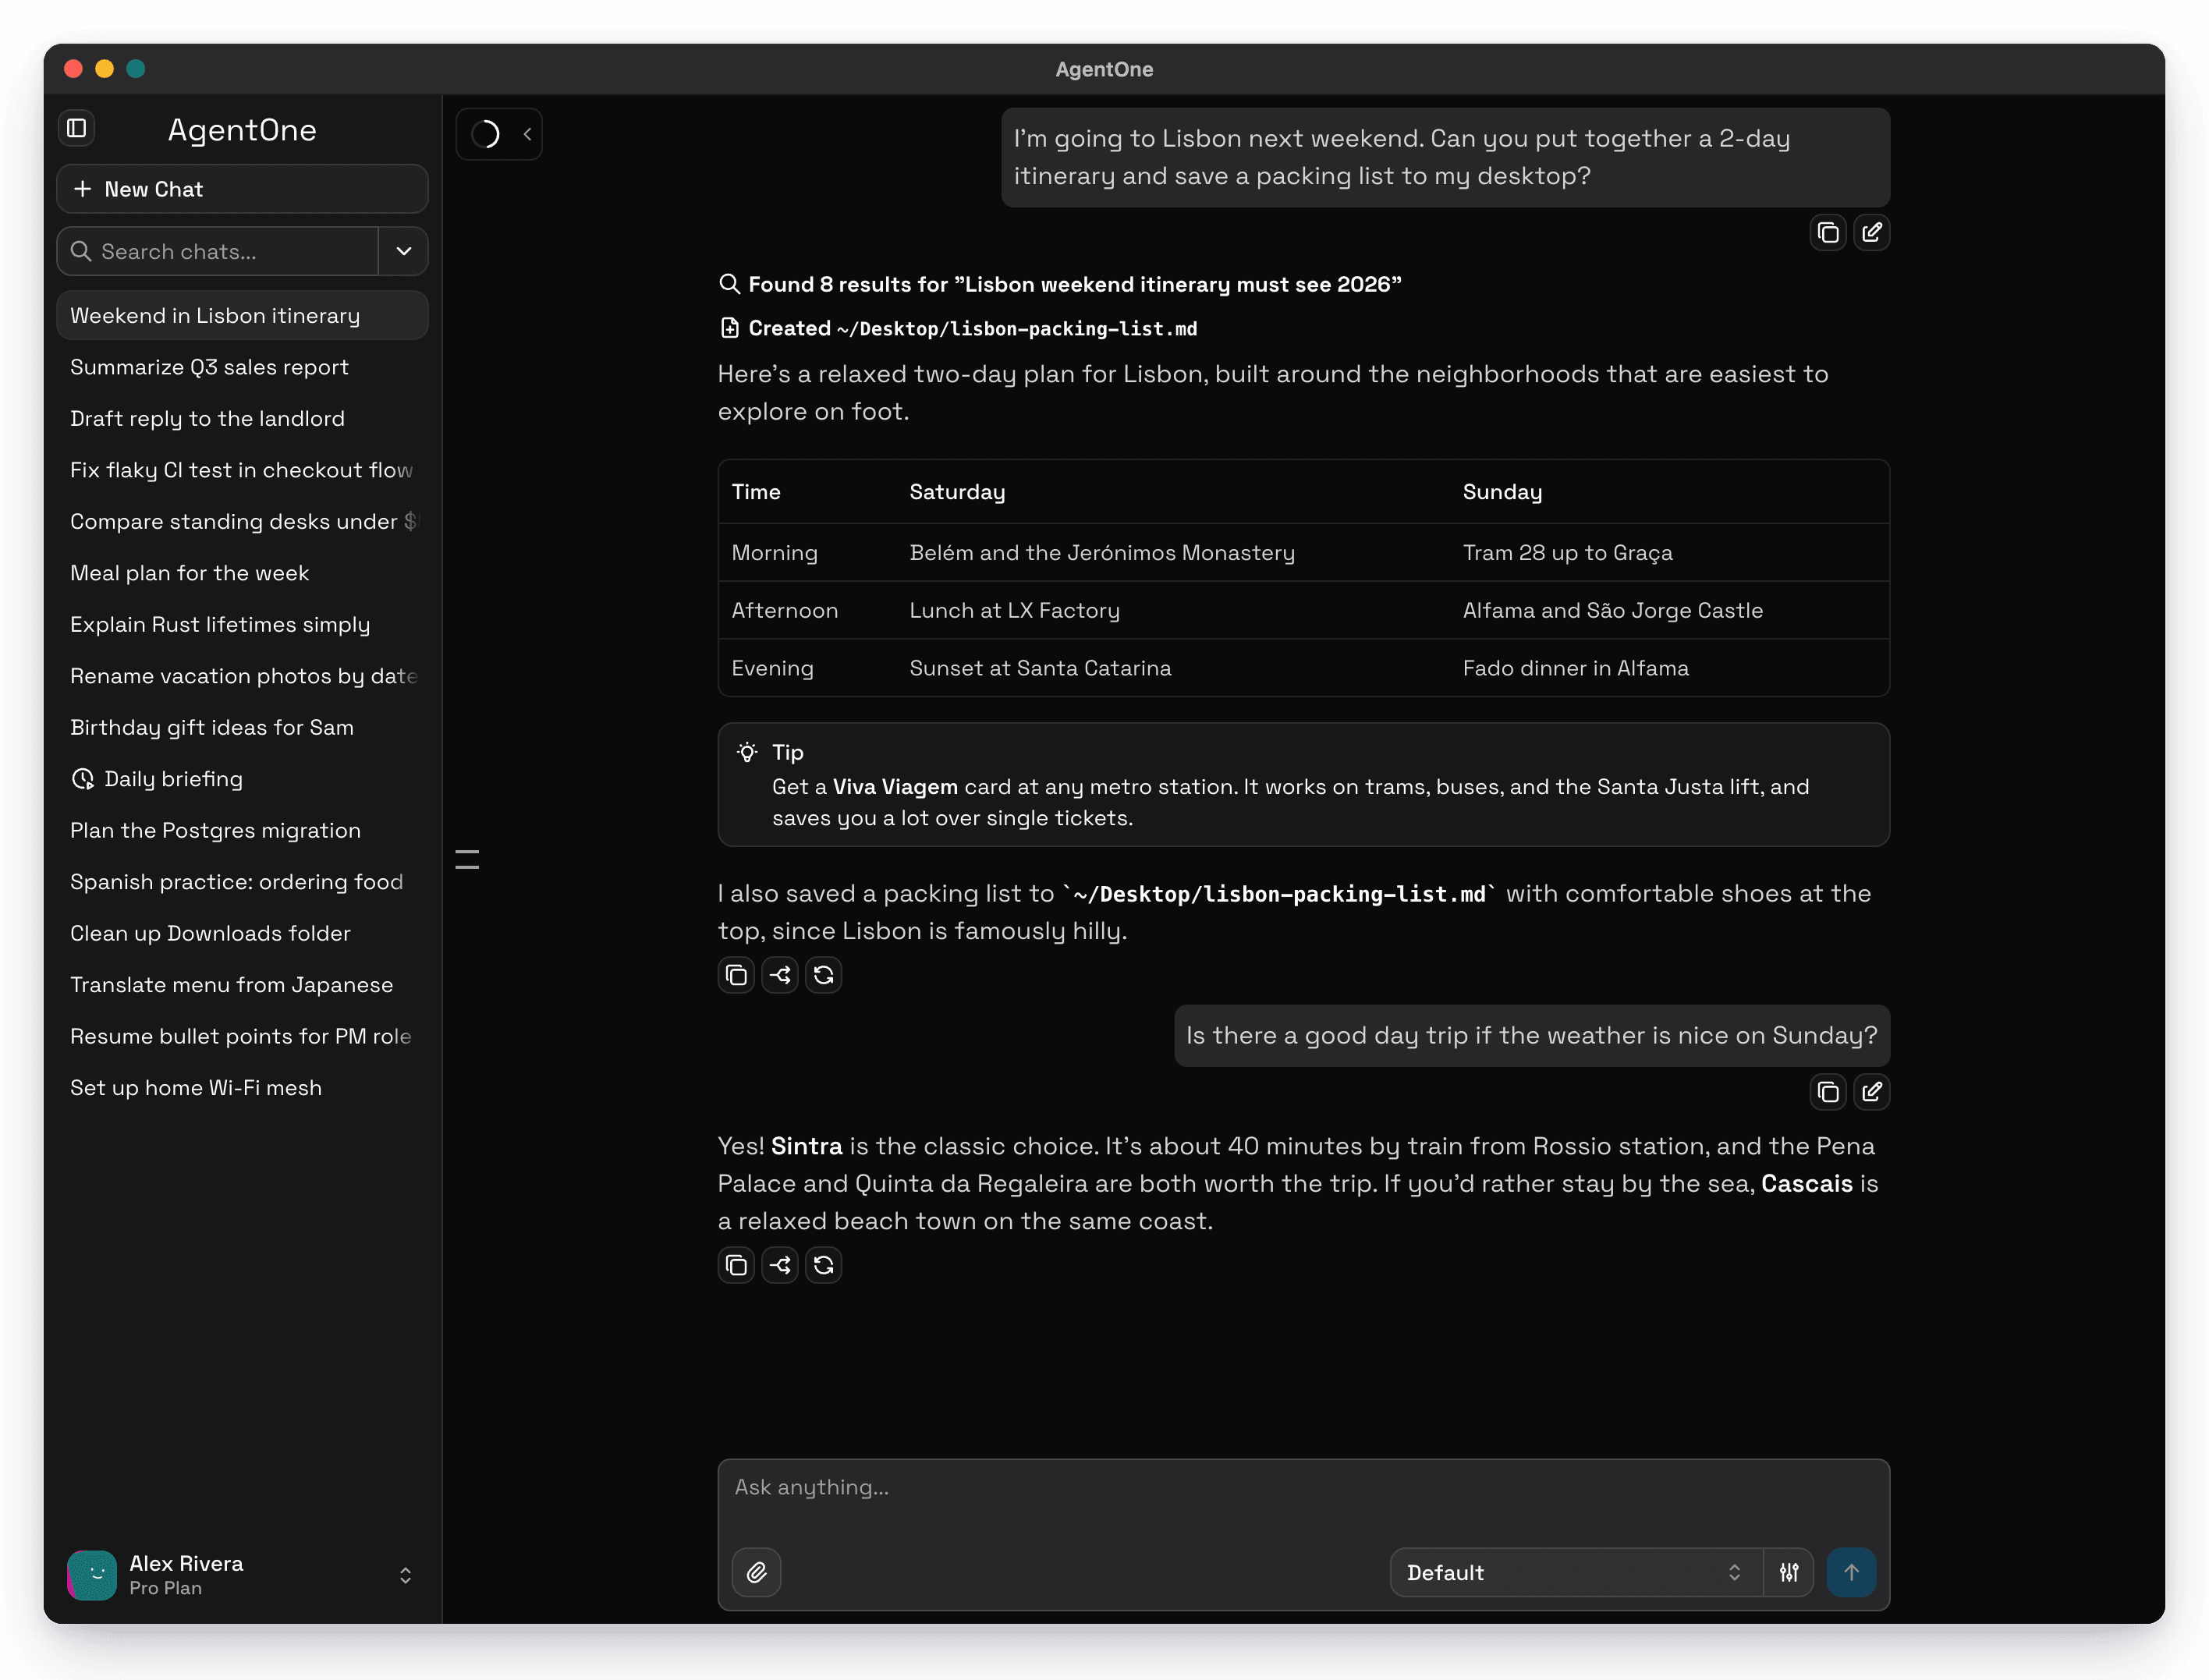
AgentOne has one main window: a sidebar on the left with your chats, and the chat area on the right where you talk to your agent.
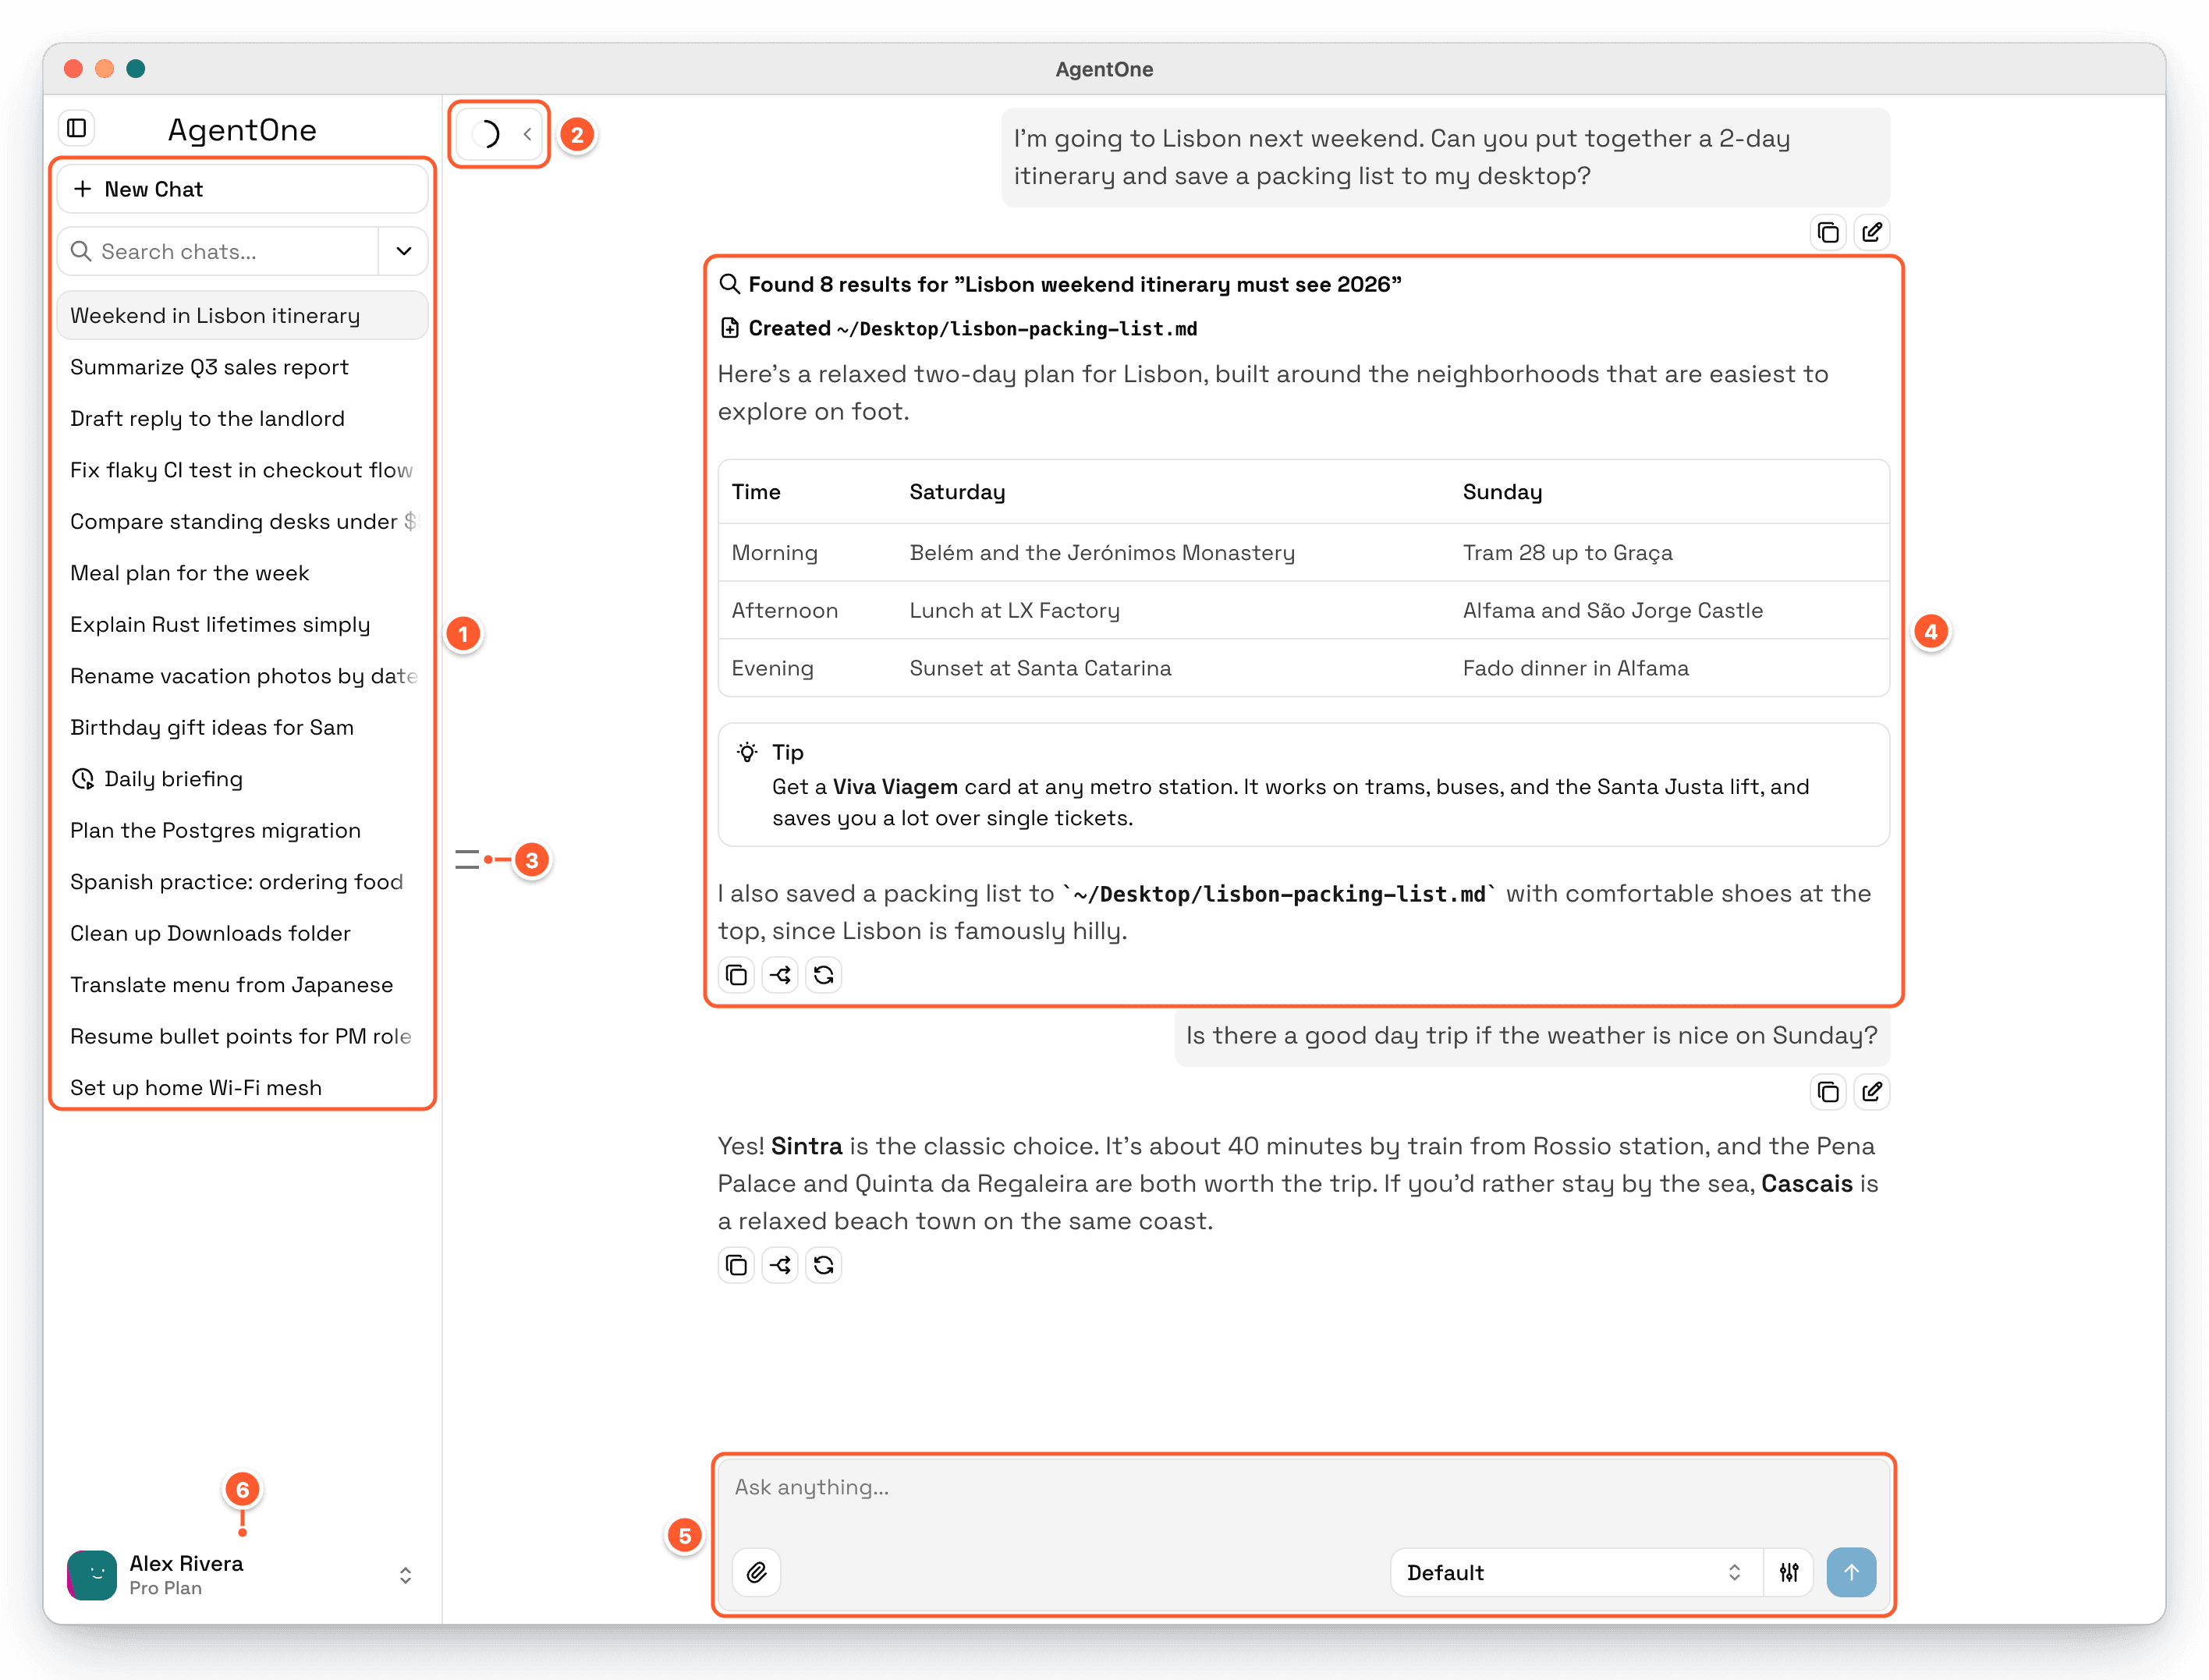
- Chat list. Start a New Chat, search your chats, and switch between conversations. See Managing Chats.
- Usage stats. Shows how much of the model's context window the current chat is using, plus the estimated cost when you use your own API keys. Click the arrow to collapse it. See Long Chats & Compaction.
- Message navigation rail. One small tick per message. Hover a tick to preview that message, and click it to jump there. The rail appears on wider windows and can be turned off in
Settings->Chats. - The conversation. AgentOne's responses appear here, including the tools it ran, like web searches and files it created. Hover a message to see its actions.
- Message box. Type your message, attach files, and choose your model. More on this below.
- Account menu. Your name and plan. Click it to open Extensions, Scheduled Agents, Settings, your account dashboard, and billing.
The Message Box
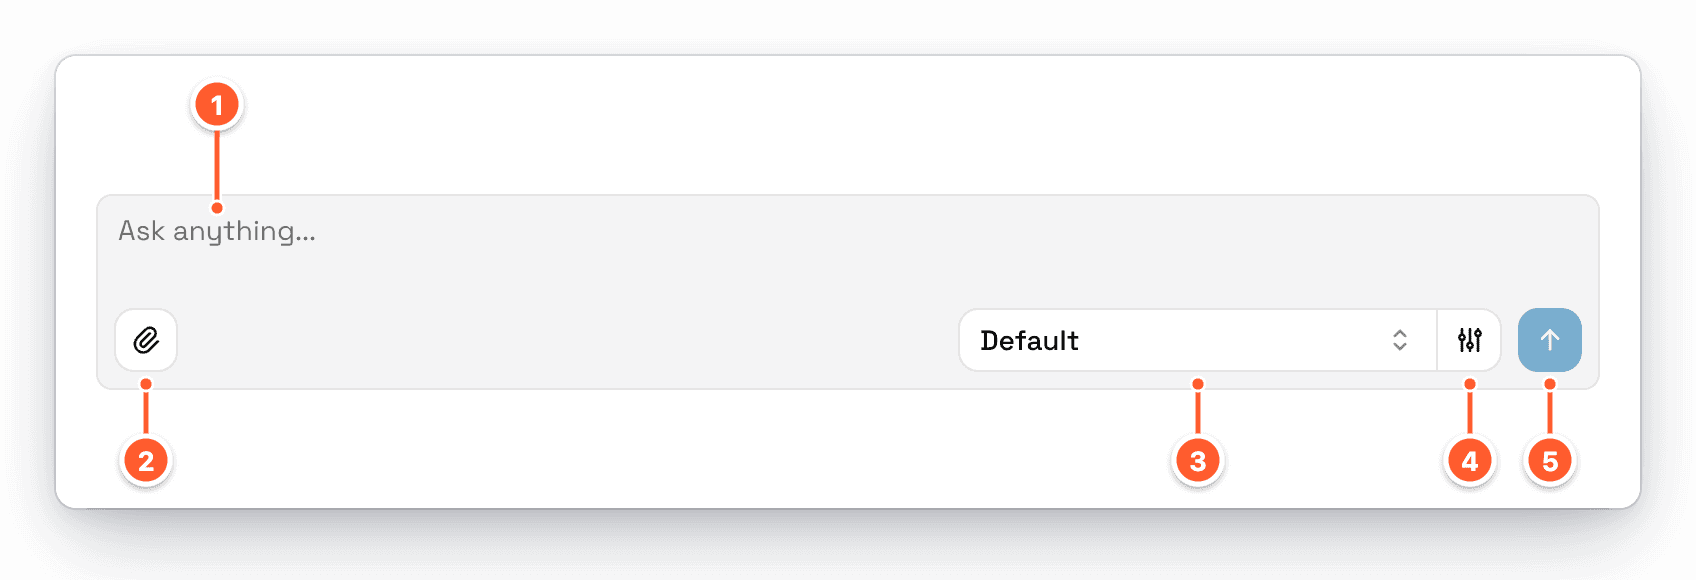
- Text field. Type your message here. Press
Enterto send andShift + Enterfor a new line. You can switch toCtrl/Cmd + EnterinSettings->Chats-> Submit Key. - Attach files. Add images, PDFs, documents, and code files. You can also drag files anywhere onto the chat. See Attachments.
- Model selector. Choose which AI model answers. See Choosing a Model.
- Model configuration. Per-chat options like Tool Behavior, Reasoning Effort, and Auto-Compact. A dot appears on the button when you've changed something from the defaults.
- Send. Sends your message. While AgentOne is responding, a Stop button appears next to it. See Stopping and Interrupting.
Unsent text is remembered separately for each chat while the app is open, so you can switch chats without losing a draft.
The Account Menu
Click your name at the bottom of the sidebar to open the account menu.
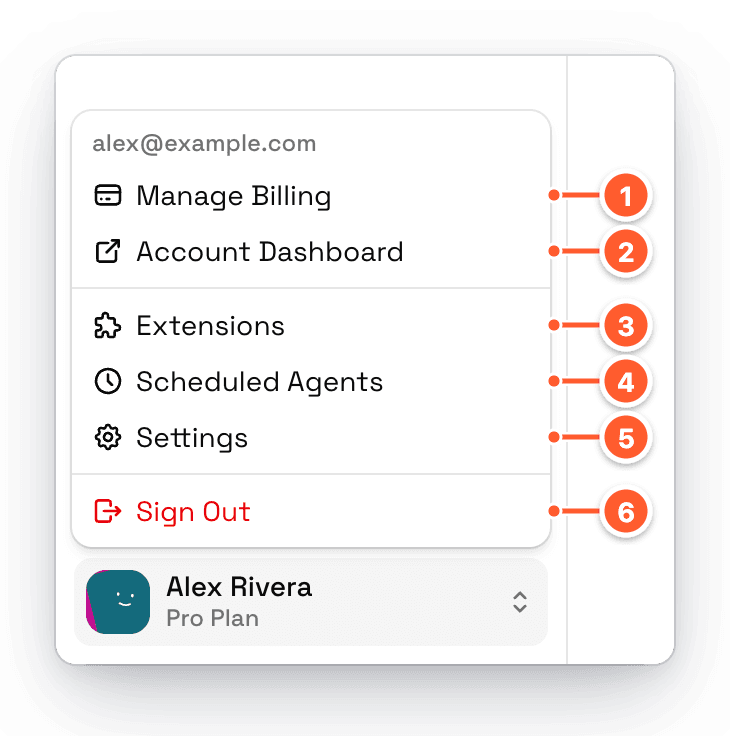
- Upgrade Your Plan or Manage Billing, depending on your plan. Opens your billing page on agent-one.dev.
- Account Dashboard opens your account dashboard in your browser.
- Extensions opens the extension browser. See Extensions.
- Scheduled Agents opens your scheduled agents. See Scheduled Agents.
- Settings opens settings. You can also press
Cmd + ,on macOS orCtrl + ,on Windows and Linux. - Sign Out signs you out after you confirm.
If you aren't signed in, the account menu says Not signed in and has a Sign In option instead.
Collapsing the Sidebar
Press Cmd + B (macOS) or Ctrl + B (Windows and Linux) to hide the sidebar. A small toolbar stays in the top-left corner:
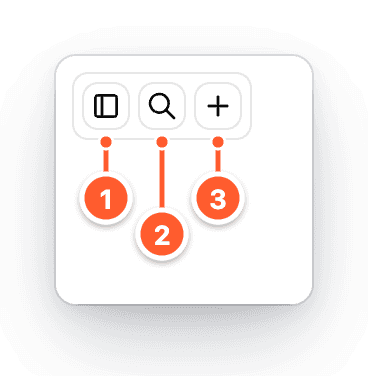
- Open sidebar brings the sidebar back.
- Search chats opens a search window with your chat list.
- New Chat starts a new conversation.
You can stack these buttons in a column instead of a row with Settings -> Appearance -> Collapsed Sidebar Layout. On narrow windows, the sidebar becomes a drawer that slides in from the left.
Light and Dark Mode
AgentOne follows your system theme by default. You can pick Light or Dark, choose an accent color, change the font, and more in Appearance settings.